Creating a custom-built look in your home doesn’t always require a full renovation. Sometimes, small changes can significantly enhance the aesthetics of a room. One such project is the installation of a DIY fluted accent wall using thin trim strips. This simple yet effective technique can transform an ordinary wall into a stylish focal point, adding depth and texture to your space. This project is perfect for those looking to update their home with a modern design twist without breaking the bank.
A fluted accent wall is perfect for adding a touch of elegance and sophistication to any room. This style is particularly effective in living rooms, dining areas, or as a striking backdrop in a bedroom. It pairs well with both contemporary and traditional decor, providing a versatile design element that complements a variety of styles. Consider painting the strips in a contrasting color for a bold statement or in the same color as the wall for a subtle, textured effect.
DIY Fluted Accent Wall
Like Home & Life Hacks for more
Materials
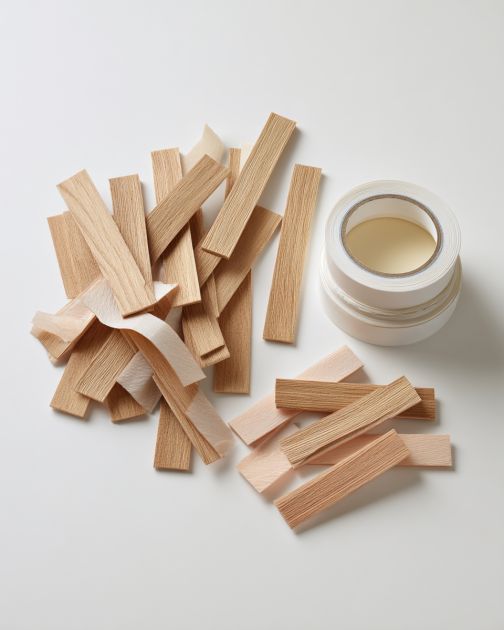
Thin wooden trim strips (1/2 inch to 1 inch wide, 8 feet long)
Measuring tape
Level
Saw (miter saw recommended)
Wood glue or construction adhesive
Nail gun with finishing nails (optional for extra security)
Primer and paint (optional for finishing)
Sandpaper (medium and fine grit)
Paintbrush or roller
All these materials are available on Amazon. Click the product name to shop
Directions
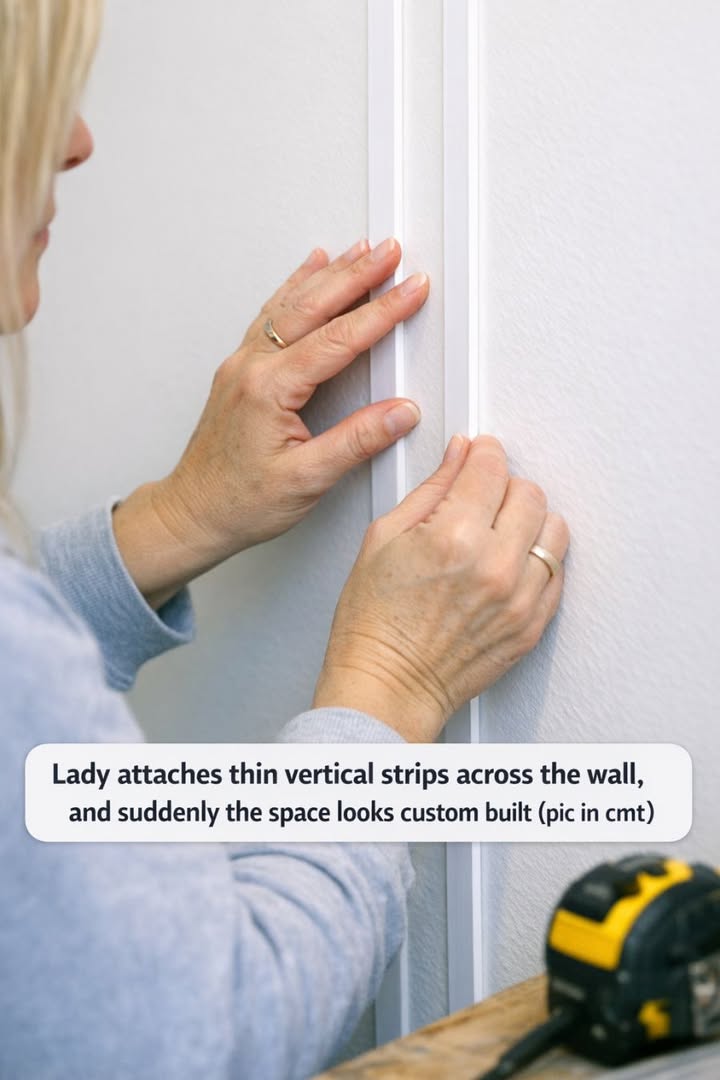
Measure the height of your wall to determine the length of trim strips needed. Cut the strips to size using a miter saw.
Sand the trim strips with medium grit sandpaper, followed by fine grit, to ensure a smooth finish.
Use a level to mark vertical lines on the wall where each strip will be placed, ensuring equal spacing between each strip.
Apply wood glue or construction adhesive to the back of each trim strip.
Press the strips firmly onto the wall, following your marked guidelines.
Use a nail gun to secure the strips in place with finishing nails, if desired, for extra stability.
Once all strips are attached, fill any gaps or nail holes with wood filler, and sand smooth once dry.
Prime and paint the strips and wall in your desired color, using a paintbrush or roller for an even finish.

Like Home & Life Hacks for more
Variations & Tips
To add a unique twist to your fluted accent wall, consider experimenting with different widths of trim strips to create varied patterns. You could also try using stained wood strips for a natural, rustic look that showcases the wood grain. For a more industrial style, opt for metal strips or incorporate LED strip lighting between the trims for a modern touch. Additionally, this technique can be applied to ceilings or used to create a half-wall effect, offering endless possibilities for customization.
This post contains affiliate links
