Creating textured wall art using plaster and sponges has become a popular trend for those looking to add a personal touch to their home decor without breaking the bank. This DIY project is perfect for anyone who wants to experiment with texture and depth in their art pieces. By using simple materials like plaster and sponges, you can create unique, tactile artworks that are sure to be conversation starters. This technique is not only cost-effective but also allows for endless creativity as you can customize the design, color, and style to match your home aesthetic.
This DIY textured wall art can be styled in a variety of ways to complement different interior design themes. For a minimalist look, opt for a monochromatic color palette and hang the artwork in a simple frame. If your home has a bohemian vibe, consider using vibrant colors and larger, more textured sponges to create a more dynamic effect. This art piece can be a focal point in a living room or a subtle accent in a bedroom or office. Pair it with complementary elements like textured pillows, rugs, or curtains to create a cohesive look. Additionally, grouping several small pieces together can create a gallery wall effect that adds depth and interest to any space.
Textured Sponge-Pressed Plaster Wall Art
Materials
Canvas or wooden panel, size of your choice
Plaster of Paris, 2 cups
Water, 1 cup
Mixing bowl
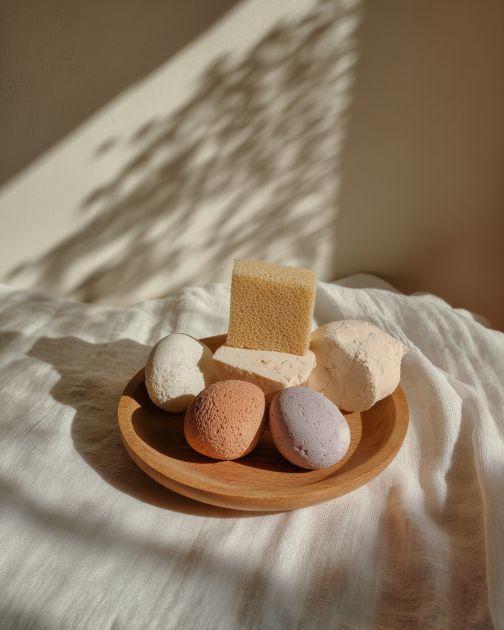
Sponge (natural or synthetic), various textures
Acrylic paint, colors of your choice
Paintbrushes
Plastic drop cloth or newspaper (for protecting surfaces)
Palette knife or spatula
Directions
Prepare your workspace by laying down a plastic drop cloth or newspaper to protect surfaces from spills.
In a mixing bowl, combine 2 cups of Plaster of Paris with 1 cup of water, stirring until you achieve a smooth consistency.
Pour the plaster mixture onto the canvas or wooden panel, spreading it evenly with a palette knife or spatula.
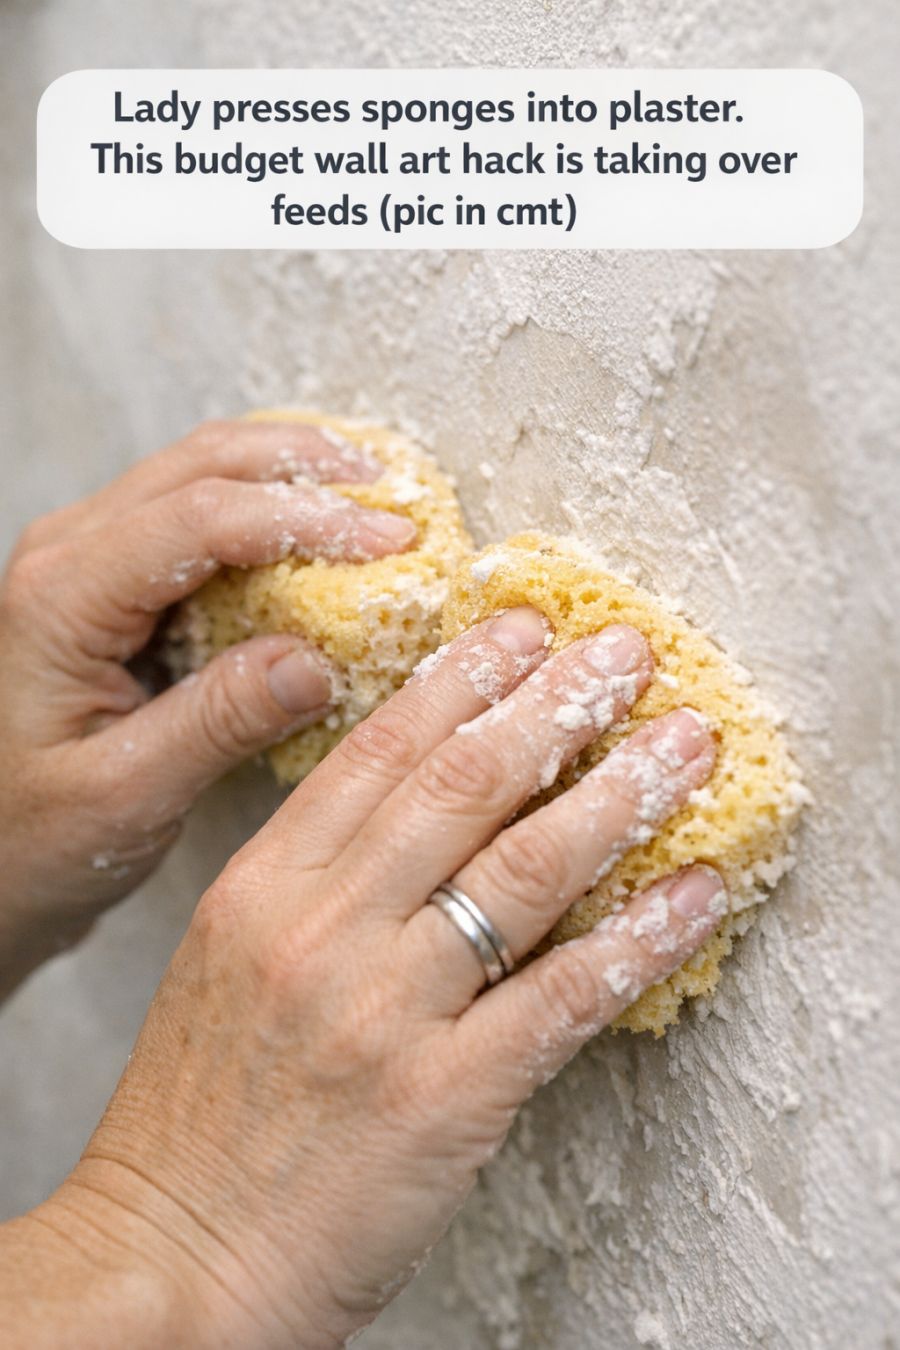
Before the plaster begins to set, take your sponge and gently press it into the plaster, creating patterns and textures. Experiment with different sponge textures for varied effects.
Allow the plaster to dry completely, which may take several hours or overnight, depending on the thickness of the application.
Once dry, use acrylic paints to add color to your textured design. You can paint the entire piece or just highlight certain areas to enhance the texture.
Let the paint dry completely before displaying your artwork.

Variations & Tips
To create different variations of this artwork, consider using different types of sponges, such as sea sponges for a more organic look or synthetic sponges for sharper patterns. You can also experiment with the thickness of the plaster to achieve different levels of texture. For a more modern look, try using metallic or iridescent paints. Additionally, you can incorporate other materials into the plaster, like sand or small pebbles, to add even more texture and interest. This DIY project encourages experimentation, so don’t be afraid to try new techniques and color combinations to suit your personal style.
